一、K8s 使用 CephFS
CephFS是 Ceph 中基于RADOS(可扩展分布式对象存储)构建,通过将文件数据划分为对象并分布到集群中的多个存储节点上来实现高可用性和可扩展性。
首先所有 k8s 节点都需要安装 ceph-common 工具:
# CentOS7
yum -y install epel-release ceph-common

# Ubuntu
apt install -y ceph-common

# 验证
ceph -v
--------------------------------------------------------------
ceph version 17.2.7 (b12291d110049b2f35e32e0de30d70e9a4c060d2) quincy (stable)
二、静态供给方式
静态供给方式需要提前创建好 CephFS 给到 K8s 使用。
2.1 在 Ceph 中创建 FS 和 授权用户
kubectl exec -it `kubectl get pods -n rook-ceph|grep rook-ceph-tools|awk '{print $1}'` -n rook-ceph -- bash

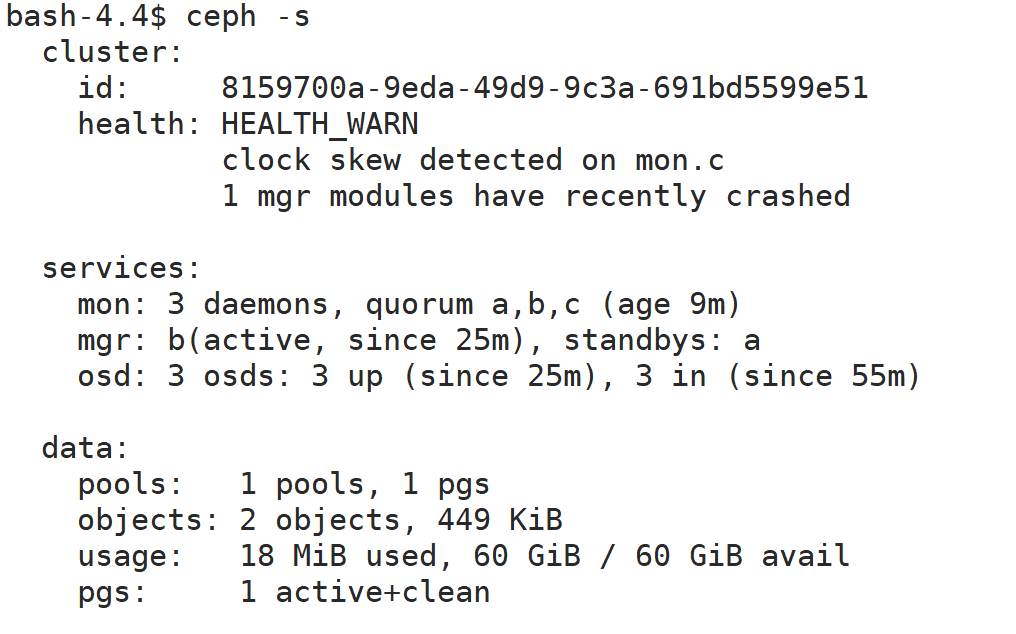
ceph -s

创建存储池:
# 数据存储池
ceph osd pool create cephfs_data_pool 16

# 元数据存储池
ceph osd pool create ceph_metadata_pool 8

创建 FS :
ceph fs new k8s-cephfs cephfs_data_pool ceph_metadata_pool

创建用户 fs-user 并授权存储池 cephfs_data_pool
查看 admin 用户秘钥:
ceph auth get-key client.admin
#--------------------------------------------
AQB3vGJnw3TlDRAAQwPu8BcvoM3ETLFXb/E/ew==

2.2 在 k8s 中创建 secret
# 退出容器
exit

# 将秘钥替换为你自己上一步获取到的秘钥
export ADMIN_USER_SECRET='AQB3vGJnw3TlDRAAQwPu8BcvoM3ETLFXb/E/ew=='

kubectl create secret generic ceph-admin-default-secret --type="kubernetes.io/rbd" \
--from-literal=key=$ADMIN_USER_SECRET \
--namespace=default

2.3 pod 直接使用 CephFS 存储
# 获取rook-ceph的svc,Cluster-IP ip
kubectl get svc -n rook-ceph

vi cephfs-test-pod.yml
# -----------------------分割线----------------------------
apiVersion: v1
kind: Pod
metadata:
  name: cephfs-test-pod
spec:
  containers:
  - name: nginx
    image: 192.168.57.200:8099/yun6/nginx:1.18
    imagePullPolicy: IfNotPresent
    volumeMounts:
    - name: data-volume
      mountPath: /usr/share/nginx/html/
  volumes:
  - name: data-volume
    cephfs:
      monitors: ["10.97.98.70:6789"]  # 配置至少一个mon服务ip地址
      path: /
      user: admin
      secretRef:
        name: ceph-admin-default-secret


# -----------------------分割线----------------------------
kubectl apply -f cephfs-test-pod.yml
查看 pod :
kubectl get pods

可以进到 pod 中查看分区情况:
# 进入容器查看存储情况
kubectl exec -it cephfs-test-pod -- /bin/bash

df -h

# 退出容器
exit

2.4 创建 PV 使用 CephFS 存储
vi cephfs-test-pv.yml
# -----------------------分割线----------------------------
apiVersion: v1
kind: PersistentVolume
metadata:
  name: cephfs-test-pv
spec:
  accessModes: ["ReadWriteOnce"]
  capacity:
    storage: 2Gi
  persistentVolumeReclaimPolicy: Retain
  cephfs:
    monitors: ["10.97.98.70:6789"]
    path: /
    user: admin
    secretRef:
      name: ceph-admin-default-secret
# -----------------------分割线----------------------------
kubectl apply -f cephfs-test-pv.yml
kubectl get pv

创建 PVC 绑定 PV :
vi cephfs-test-pvc.yml
# -----------------------分割线----------------------------
apiVersion: v1
kind: PersistentVolumeClaim
metadata:
  name: cephfs-test-pvc
spec:
  accessModes: ["ReadWriteOnce"]
  resources:
    requests:
      storage: 2Gi
# -----------------------分割线----------------------------
kubectl apply -f cephfs-test-pvc.yml
查看 pvc 和 pv :
kubectl get pvc

kubectl get pv

测试 pod 挂载 pvc:
vi cephfs-test-pod1.yml
# -----------------------分割线----------------------------
apiVersion: v1
kind: Pod
metadata:
  name: cephfs-test-pod1
spec:
  containers:
  - name: nginx
    image: 192.168.57.200:8099/yun6/nginx:1.18
    imagePullPolicy: IfNotPresent
    volumeMounts:
    - name: data-volume
      mountPath: /usr/share/nginx/html/
  volumes:
  - name: data-volume
    persistentVolumeClaim:
      claimName: cephfs-test-pvc
      readOnly: false
# -----------------------分割线----------------------------
kubectl apply -f cephfs-test-pod1.yml
查看 pod :
kubectl get pods
